An ice dam doesn't look dangerous. It looks like a thick ridge of ice at the edge of your roof — even kind of picturesque in January. But behind that wall of ice, meltwater is working its way under your shingles, soaking your attic insulation, and quietly rotting the wood that holds your roof up.
Every winter in Lancaster and throughout Fairfield County, Ohio homeowners discover ceiling stains, soft drywall, and damaged insulation — all traceable to a dam that formed and went unaddressed for weeks. The damage is rarely obvious from outside. By the time you notice a water stain on your ceiling, the intrusion has typically been active for days, sometimes longer.
This guide covers everything you need to know: what ice dams are and why Ohio's climate creates ideal conditions for them, how they form, the full scope of damage they cause, six proven prevention methods, what to do if you already have one, and how insurance applies to the damage.
What Are Ice Dams and Why Does Ohio Get Them?
An ice dam is a ridge of ice that forms at the lower edge of a roof — typically along the eaves and gutters — and prevents meltwater from draining off the roof properly. The water that pools behind the dam has nowhere to go except under the shingles, where it penetrates the roof deck and enters the home.
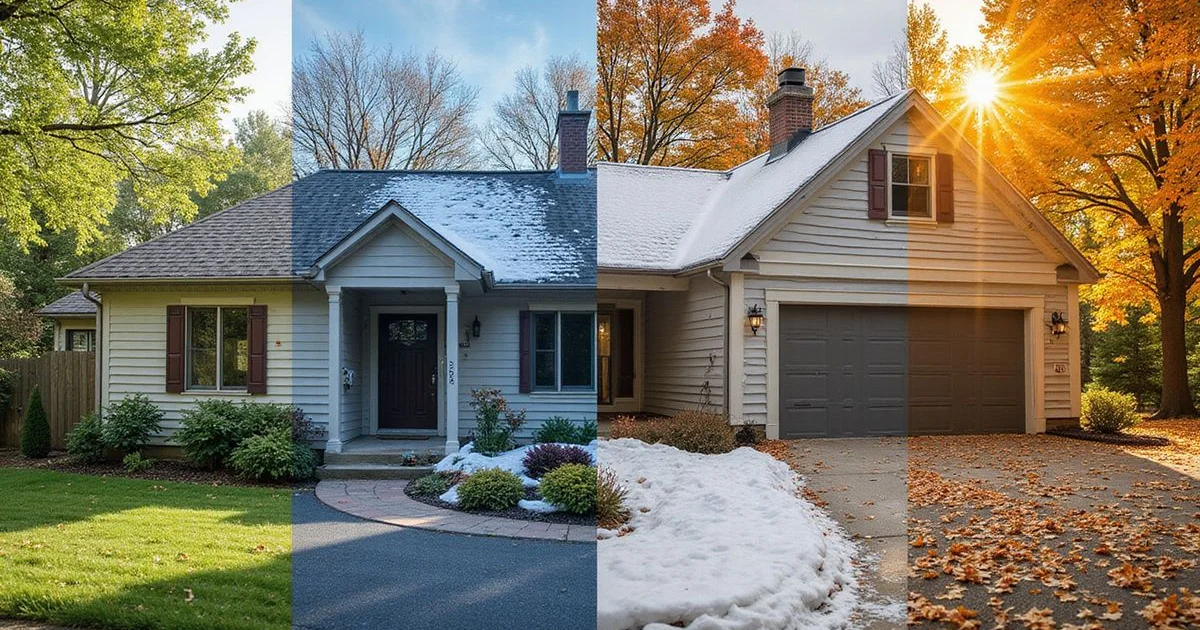
Ohio is particularly vulnerable to ice dam formation for three reasons. First, our winters are characterized by repeated freeze-thaw cycles rather than sustained deep cold. Temperatures that swing from the low 20s at night to the mid-30s during the day create exactly the warm-upper-roof, cold-lower-eave differential that drives ice dam formation. Second, Fairfield County receives an average of 25 to 30 inches of snow per year — enough accumulation to feed consistent meltwater flow. Third, a significant percentage of Ohio's housing stock predates modern attic insulation standards, meaning many homes have the thermal leakage that turns every snowstorm into a potential ice dam event.
In a properly insulated and ventilated attic, none of this matters. The roof deck stays uniformly cold, snow melts only when ambient temperatures rise above freezing, and water drains off normally. Ice dams are almost exclusively a symptom of an attic that is too warm relative to the outside.
How Ice Dams Form: The Warm Attic / Cold Eave Cycle
The physics of ice dam formation are straightforward, but understanding them precisely is what separates effective prevention from guesswork. The process unfolds in three stages every time temperatures drop after a snowfall.
Stage 1 — Heat Escapes Through the Roof Deck. Warm air from your living space rises and, if attic insulation is inadequate, conducts heat into the attic and up through the roof sheathing. The area of the roof above the heated living space — typically from the ridge down to where the eaves begin — warms above 32°F.
Stage 2 — Meltwater Flows to the Cold Eave. Snow on the warmed upper roof section melts and flows downward as liquid water. When it reaches the eave — which extends beyond the heated attic space and sits at or below ambient temperature — it refreezes. Over hours and days, this frozen meltwater accumulates into the characteristic ridge of ice: the dam.
Stage 3 — Water Backs Up Behind the Dam. Subsequent meltwater from above cannot drain past the ice dam. It pools on the roof, where it is subject to capillary action and gravity. Even a minimal head of water is sufficient to work its way up under shingle laps — the overlapping portions are not designed to resist water flowing upward or sideways — and penetrate the underlayment and roof deck.
The following table illustrates the temperature differential that drives the process:
| Roof Zone | Typical Winter Temp (Ohio) | What Happens to Snow |
|---|---|---|
| Upper Roof (over heated attic) | 35–45°F surface temp | Melts even when air temp is below freezing |
| Lower Eave (over unheated overhang) | 25–30°F surface temp | Meltwater refreezes on contact |
| Properly insulated roof (all zones) | Matches ambient air temp | No differential melt; no dam formation |
The key insight: ice dams are not caused by cold weather. They are caused by the temperature differential between the upper and lower roof. A roof that is uniformly cold will not produce ice dams regardless of how much snow falls on it.
The Real Damage Ice Dams Do to Ohio Roofs
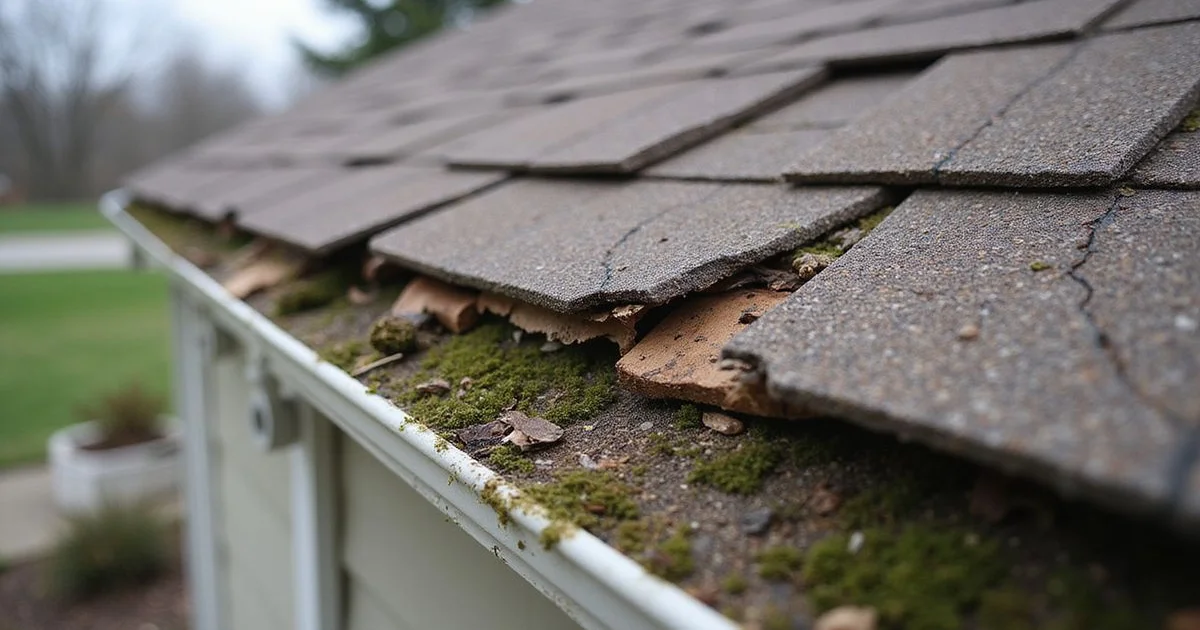
Homeowners often underestimate ice dam damage because the roof's exterior surface can appear intact while significant damage accumulates inside. Understanding the full cascade of consequences is important for prioritizing response.
Shingle Undermining. When water backs up under shingles, it saturates the asphalt mat and degrades the adhesive sealant strip. Shingles that have experienced repeated ice dam intrusion are significantly more vulnerable to wind lift — they will fail at lower wind speeds than undamaged shingles. This damage is often invisible from the ground but becomes apparent during inspection when shingles lift more easily than they should.
Roof Deck Rot. Water that penetrates the shingles contacts the plywood or OSB roof deck. Wood sheathing that cycles through wet and dry conditions deteriorates rapidly — the outer plies of plywood delaminate, and OSB loses structural integrity when repeatedly wetted. A deck compromised by ice dam intrusion may require partial or full replacement at significant cost.
Fascia and Soffit Rot. Ice dams place enormous weight on gutters, which in turn stress the fascia boards to which they are attached. As ice melts into the fascia zone, the wood absorbs moisture. Fascia rot is common in homes with chronic ice dam problems and frequently requires complete fascia board replacement before new gutters can be installed.
Wet Insulation and R-Value Loss. Insulation that absorbs water loses its thermal resistance almost immediately. Fiberglass batts at R-19 drop to near R-0 when saturated. Cellulose insulation compacts and loses loft. Beyond the immediate R-value loss, wet insulation provides an ideal environment for mold growth — and mold that establishes itself in attic insulation typically requires full insulation removal and replacement, plus professional mold remediation, before new insulation can be installed.
Mold Growth. The attic environment — dark, with organic material (wood framing) and intermittent moisture — is ideal for mold establishment. Mold can begin colonizing within 24 to 48 hours of initial wetting and can spread extensively before any visible sign appears on interior ceilings. Once mold reaches the ceiling drywall or wall cavities, remediation costs escalate sharply.
Ceiling and Drywall Damage. Water that travels through the roof deck eventually finds its way to the ceiling assembly. The first visible sign is typically a yellowish-brown stain on the ceiling. At this stage, the drywall has already been saturated — the stain represents dried mineral deposits from water that has already evaporated, not the current water front. Active intrusion means the damage is ongoing, not past.
6 Proven Methods to Prevent Ice Dams Before They Form
Prevention falls into two categories: permanent solutions that address the root cause (attic thermal management) and supplemental measures that reduce risk in the interim or in chronically problematic areas.
Step 1: Improve Attic Insulation. Ohio's recommended insulation level for attics is R-49 to R-60, per the Department of Energy's climate zone guidelines. Most pre-1980 homes in Lancaster have R-11 to R-19 — less than a third of the recommended value. Upgrading to the recommended level is the single most effective ice dam prevention measure available. Blown-in cellulose or open-cell spray foam can achieve the target R-value while conforming to irregular attic geometry. Cost: $1,500 to $3,500 for most Lancaster-area homes. This investment typically pays for itself in energy savings within 5 to 8 years, independent of any ice dam prevention benefit.
Step 2: Seal Attic Air Leaks First. Before adding insulation, every attic bypass must be sealed. Recessed light fixtures, plumbing penetrations, attic hatch perimeters, HVAC ducts, and top plates of interior walls are common leak points. Air leaks contribute dramatically more heat to the roof deck per square foot than conductive heat loss through inadequate insulation — a 1-square-inch gap at 70°F interior temperature can transfer more energy per hour than several square feet of under-insulated ceiling. Air sealing is typically performed with rigid foam board, caulk, and spray foam before the insulation layer is added.
Step 3: Balance Attic Ventilation. A properly ventilated attic keeps the entire roof deck at the same temperature as the outside air during winter, eliminating the temperature differential that drives ice dam formation. The standard for balanced ventilation is equal net free area of intake (soffit vents) and exhaust (ridge vents), following the 1:300 ratio (1 sq. ft. of ventilation per 300 sq. ft. of attic floor area when balanced, or 1:150 when unbalanced). Blocked soffit vents — common in older homes where insulation has been pushed against the eaves — are a frequent culprit. Baffles installed before new insulation keep the soffit-to-ridge airway open. See our guide on roof ventilation problems Ohio homeowners commonly encounter for more detail on diagnosing ventilation deficiencies.
Step 4: Install Heat Cables on Chronic Problem Areas. In areas where ice dams form despite insulation and ventilation improvements — typically north-facing eaves or areas shaded by dormers — UL-listed self-regulating heat cables provide supplemental protection. Self-regulating cables (as opposed to constant-wattage cables) increase their heat output when temperatures drop and reduce output when temperatures rise, making them energy-efficient and safe for continuous use. Install in a zigzag pattern extending 12 to 24 inches above the eave line, with cable runs also inserted into downspouts to prevent ice blockage at the exit point. Install before the first freeze — retroactively threading cables under existing ice is impractical and risks shingle damage.
Step 5: Use a Roof Rake After Heavy Snowfall. After any snowfall exceeding 4 inches, a plastic-blade roof rake used from the ground removes the fuel that feeds ice dam formation. Clear the first 18 to 24 inches above the eave line — this eliminates the snow that would otherwise melt and refreeze at the dam zone. Use a rake with a plastic or aluminum head, not metal, and pull snow straight down the slope — never sideways across shingles, which abrades granules. This is a management measure, not a fix: if you stop raking for one storm, the conditions reset. It is most useful during the transition period while attic upgrades are being planned or executed.
Step 6: Monitor for Active Water Intrusion During Melt Cycles. After any freeze-thaw cycle, check your attic with a flashlight for new water stains on the sheathing or rafters, and check interior ceilings for new discoloration. Attic checks during or immediately after a melt event — not days later — allow you to catch intrusion before significant damage accumulates. Mark any existing stains with chalk so you can identify new ones. If you find active dripping or wet insulation, call for an emergency inspection immediately rather than waiting for spring.
What NOT to Do: Common Removal Mistakes That Cost More Than the Dam Itself
The urgency of active ice dam leakage leads many homeowners to attempt removal methods that cause more damage than the dam itself. Understanding why these approaches fail is important before you reach for any tool.
Do not use a metal chisel, ice pick, or hammer directly on the ice. The force required to chip ice from a frozen dam is sufficient to puncture or crack shingles — asphalt shingles in sub-freezing temperatures are brittle and fracture under impact in ways they would not in warmer conditions. Chipping also dislodges granules in the shingle area adjacent to the dam, accelerating shingle aging. The tool eventually contacts the shingle surface, and even a glancing blow can crack the mat.
Do not apply rock salt or calcium chloride directly to shingles. Calcium chloride is the only de-icing chemical generally considered acceptable for limited, targeted use near roofs — in a fabric tube placed on top of the dam, not spread directly on shingles. Rock salt (sodium chloride) should never be used on or near roofing: it accelerates corrosion of metal flashings, gutters, and fasteners, and damages asphalt shingles through chemical degradation. It also kills vegetation below the roofline when it washes off.
Do not use a pressure washer. High-pressure water destroys shingle granules, forces water under shingle laps (potentially causing immediate additional water intrusion), and can fracture shingles in cold temperatures. Pressure washing in sub-freezing conditions also creates immediate refreezing hazards on walkways and ladders.
Do not use a propane torch or heat gun directly on shingles. Open flame near asphalt roofing material is an obvious fire risk, but beyond that, the radiant heat from a torch held near shingles causes the asphalt to soften and the granule adhesion to fail. Torching is used in roofing only under controlled conditions with specific modified bitumen materials — it is not appropriate as a DIY ice removal method.
Do not use a ladder on an iced roof without professional fall protection equipment. Ice-covered roofs are among the most hazardous surfaces a person can walk on. Emergency room visits from ice dam removal falls are a documented winter phenomenon in Ohio. If the dam requires physical intervention beyond what you can accomplish safely from the ground with a roof rake, the situation requires a professional with appropriate equipment.
Safe Ice Dam Removal When You Already Have One
If a dam has already formed and you need to address it, the options depend on whether it is actively causing intrusion or is dormant.
Roof Raking From the Ground (Safe for Homeowners). If the dam is not yet causing visible interior leakage, removing snow from the eave area with a plastic-blade roof rake from the ground removes the meltwater source and prevents the dam from growing. You cannot remove the ice dam itself with a roof rake — the goal is to remove the snow above the dam line so that no additional meltwater flows into it. This is the only ice dam intervention that is genuinely safe for homeowners to perform themselves.
Calcium Chloride Tubes (Limited DIY Option). Filling a nylon stocking or mesh tube with calcium chloride crystals and placing it perpendicular to the dam — creating a channel for water to drain — can provide temporary relief. The tube should lie across the dam with its end extending past the eave line, not along the dam. This method is slow and most effective during mild weather when temperatures hover near freezing.
Professional Steam Removal (When Active Intrusion Exists). When a dam is actively causing interior leakage, professional intervention using steam equipment is the appropriate response. A steam lance directs low-pressure steam at the ice, melting channels through the dam without the impact damage of chipping tools and without the hazards of pressure washing. Professionals also have the fall protection equipment necessary to work safely on icy roofs. The cost for professional steam removal in the Lancaster area typically ranges from $300 to $700 depending on dam extent.
When to Call Immediately. If you observe water actively dripping through your ceiling or interior walls during a melt event, call for emergency service rather than attempting self-remediation. The interior damage at this stage is ongoing, and the priority is stopping the intrusion — not the dam removal itself. A professional can install temporary interior diversion to protect belongings and assess the intrusion point while arranging permanent repair.
Signs You Should Call a Professional Immediately
Not every ice dam requires emergency response, but certain signs indicate a situation that has progressed beyond watchful waiting:
- Active ceiling drips during or after a melt cycle. A dripping ceiling during a thaw means water is actively flowing through your roof assembly. This is not a "wait and see" situation — water is contacting electrical wiring, saturating insulation, and degrading drywall as you observe it.
- New water stains appearing on ceilings or walls mid-winter. A stain that was not present before the last snowstorm and appears during a warm spell is evidence of active ice dam intrusion. Even if the dripping has stopped (because temperatures dropped again), the intrusion will resume with the next melt.
- Visible mold on ceiling drywall or attic sheathing. Mold visible to the naked eye represents a colony that has been growing for days to weeks. The visible area is typically a fraction of the affected area. Professional mold assessment is required before any remediation work begins.
- Sagging or bubbling drywall. Ceiling drywall that has absorbed water may sag or develop a bubble of pooled water. This represents a risk of sudden collapse — an adult can be injured by falling saturated drywall panels. Do not stand beneath a bubbling ceiling without first puncturing the bubble to drain the pooled water into a container.
- Ice dam visible from inside the attic. In severe cases, ice can penetrate far enough under the shingles to be visible from inside the attic at the eave line. This indicates significant sheathing and underlayment compromise and requires professional assessment of structural damage before repair work proceeds.
Does Insurance Cover Ice Dam Damage in Ohio?
Ohio homeowners insurance coverage for ice dam damage is nuanced, and the distinction between what is covered and what is not often surprises homeowners when they file a claim.
What is typically covered: Most standard Ohio homeowners policies cover "sudden and accidental" water damage from ice dams — specifically, water intrusion through the roof that damages ceilings, walls, floors, and personal property inside the home. If your ceiling collapses due to ice dam water intrusion, the interior damage is almost certainly covered.
What is typically not covered: The underlying cause — poor insulation, inadequate ventilation — is treated as a maintenance deficiency, not a covered peril. Insurers will not pay to upgrade your attic insulation or ventilation, even if those deficiencies directly caused the claim. Additionally, the roof system itself (shingles, underlayment, deck) may not be covered if the insurer can establish that the damage resulted from deferred maintenance rather than a sudden event.
Documentation is critical. Photograph the ice dam itself from the ground before any removal is attempted. Photograph all interior damage — ceilings, walls, attic — as soon as you discover it. Contact your insurer within the policy's reporting window, which varies but is often 30 to 60 days from discovery of damage. Late reporting is a common basis for claim denial. For more detail, see our guides on whether homeowners insurance covers roof leaks in Ohio and how to file a roof insurance claim in Ohio.
Supplement your documentation with a professional inspection report. An inspection report from a licensed contractor identifying the damage and its probable cause is valuable supporting documentation for your claim. Adjusters give more weight to contractor reports than to homeowner-produced photos alone, and a report that specifically attributes damage to ice dam intrusion (rather than pre-existing wear) strengthens your position.
The Real Cost of Ice Dam Damage vs. Prevention Cost
The financial case for prevention over remediation is compelling. The following table illustrates the cost comparison for a typical Lancaster-area home:
| Scenario | Typical Cost Range | Notes |
|---|---|---|
| Attic insulation upgrade (R-49 to R-60) | $1,500 – $3,500 | Includes air sealing; energy savings offset cost over 5–8 years |
| Ventilation improvement (soffit + ridge) | $800 – $1,500 | Often combined with insulation upgrade |
| Heat cable installation | $300 – $800 | Supplemental measure for chronic problem eaves |
| Total prevention investment | $800 – $3,000 | Permanent elimination of ice dam formation |
| — | — | — |
| Minor leak repair (caught early) | $500 – $2,000 | Shingle repair, underlayment patch, interior ceiling repair |
| Moderate damage (wet insulation + drywall) | $3,000 – $8,000 | Insulation removal, drywall replacement, mold testing |
| Severe damage (mold + deck repair + interior) | $8,000 – $15,000+ | Full remediation; may require temporary displacement |
| Worst case (structural deck compromise) | $15,000 – $30,000+ | Partial roof replacement plus full interior remediation |
The ROI calculation is straightforward: a $2,000 attic insulation upgrade that prevents a single moderate ice dam event ($5,000 in damage) returns 150% on the investment in avoided repairs alone — before accounting for energy savings. Most Lancaster homeowners who have experienced ice dam damage report wishing they had made the attic investment years earlier.
The Permanent Fix: Attic Insulation + Ventilation Upgrade
Heat cables, roof raking, and professional steam removal are useful tools, but they are management measures — they address symptoms rather than cause. The only permanent solution to ice dam formation is eliminating the temperature differential between the upper and lower roof.
That means two things done together: upgrading attic insulation to R-49 to R-60, and ensuring balanced soffit-to-ridge ventilation. Insulation alone is insufficient if attic air leaks are conducting heat to the roof deck — which is why air sealing is the prerequisite step. Ventilation alone is insufficient if the attic is poorly insulated — it cannot move cold air fast enough to overcome the heat load from a poorly insulated ceiling.
When both are addressed correctly, the roof deck temperature matches ambient air temperature during cold weather. Snow on the roof melts only when air temperatures rise above 32°F — uniformly, from ridge to eave — and drains off normally. Ice dams become physically impossible.
This upgrade also eliminates the conditions that cause summer heat gain through the roof assembly, reducing cooling loads, and addresses the humidity-driven condensation in the attic that can cause sheathing rot independent of any ice dam activity. The ventilation-insulation upgrade is the most cost-effective single improvement most older Ohio homes can make. For more on ventilation, read our deep-dive on roof ventilation problems Ohio homeowners are ignoring.
What to Do This Week
If you are reading this during winter and have not yet experienced visible ice dam damage, you are in the best possible position: prevention is still fully available to you.
- This week — inspect your attic. Look for water stains on sheathing and rafters (brown or gray discoloration), sagging insulation, or any sign of moisture near the eave line. If you find evidence of past intrusion, note the location so you can monitor it during the next melt cycle.
- After the next snowfall — check your eaves. If you can see ice building up at the roofline within 24 to 48 hours of a snowfall, while temperatures remain below freezing, your attic is conducting enough heat to melt snow — and an insulation and ventilation assessment is warranted.
- Schedule an insulation and ventilation assessment. A professional assessment will identify your current insulation R-value, locate air leaks, evaluate ventilation balance, and provide a specific scope of work and cost. This assessment is the foundation for any prevention strategy.
- If you have active leakage — call now. Contact Fairfield Peak Roofing for an emergency inspection. Active water intrusion through a roof during a melt cycle requires immediate professional assessment to stop ongoing damage and evaluate the full scope of what has already occurred.
Ice dams are a solvable problem. The technology to eliminate them permanently — attic insulation and balanced ventilation — has existed for decades and is straightforward to install. The homeowners who suffer the most expensive damage are those who treated the first visible ice dam as a cosmetic nuisance rather than as the warning sign it is. Don't be that homeowner. Call us at 877-367-1885 or schedule an inspection online.
Need Help with Your Roof?
Get an inspection and estimate from Lancaster's most trusted roofing team.